As a leading provider of learning technology solutions, we often get questioned about the ‘quality’ of our solutions and services; what it means to us and how we ensure ‘great’.
For us, quality begins from the very onset of the project. From the instructional design approach to the project management process; from visualisation to the total User Experience (UX); from project conceptualisation to learner engagement, and beyond. It is the culmination of clear expectation setting with meticulous thoughts, followed by standardised procedures, process compliance, and thorough QA.
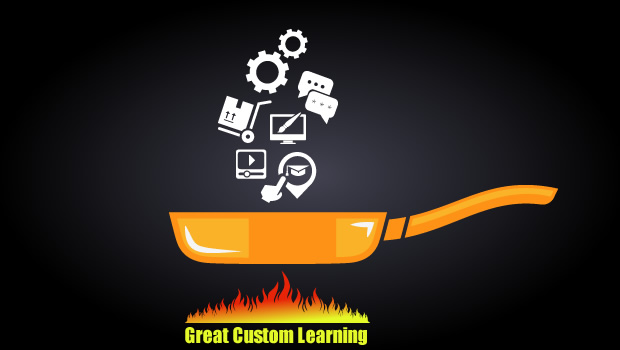
To understand better, let’s take an analogy of well cooked food. Follow the recipe and you get the perfect dish. The key however is to ensure that the quality is maintained in each step, from choosing the ingredients to serving the dish, in order to get a tantalising taste. Similarly, in context of Custom Learning, ensuring ‘great’ quality is a 5 step recipe, of which the very first is gathering the ingredients.
Step 1: Requirement Gathering
The key ingredient is client’s requirement – understanding, analysing and setting expectations accordingly so that everyone (your team and the client) is on same page. The very nature of Custom Learning makes it important to customise the process as per the client and project; so each may have its own specific process.
Just like we seek out and choose the best quality ingredients for cooking, it is important to take inputs, feedback, and have the queries addressed by the client, for an in-depth perspective on the overall requirement, before selecting the best quality designing and development approach.
Then comes the chopping or in our case discussing with the leads/SMEs about the requirement, brainstorming with them to come up with the best possible solution and estimating the effort and time.
Step 2: Project Initiation
This step is quite similar to having all the utensils and other necessary kitchenware and condiments at hand.
Appointment of a Project Manager and team allocation, followed by formal introduction of both the teams and a walkthrough of the overall project development process plays a pivotal role in establishing a level playing ground for all stakeholders. This, in turn, facilitates a flawless operational mechanism.
Step 3: Prototype
Though this is not much of a prototype, at times we check the heat and make a small portion of whatsoever we are planning to cook and check the end result before cooking for a large gathering. In case of content design, prototyping saves the time that might be spent on redesigning, in case the final product is of unacceptable quality or doesn’t meet the client’s expectations. An excellent idea is to invest time in brainstorming. Such sessions help all team members involved in the development of the course, namely Graphic designers, Instructional Designers, Programmers, Testers, Project and Delivery Managers, to see the bigger picture and together decide the correct approach and course of action in line with the client’s requirements.
Having a clean and well planned storyboard for the prototype negates the chances of post review changes. Prototyping also assists in listing the specific customisations/additions required for the course and plan resources accordingly.
The process of self-review ensures that the established standards are maintained during the course of the development and increases chances of first time right output. Internal issue solving, followed by the random testing, and then the review by the testing or QA team ensures the efficiency of the prototype and guarantees minor or no change requests from the client end.
Step 4: Development
This is where the magic takes place. With the required ingredients, instruments and a well oiled methodology/strategy at hand, the actual process of development is simplified to a great extent.
While cooking, just the way it is necessary to follow a particular sequence while adding the ingredients, it is crucial that standard steps be followed during development.
Valuing the client’s involvement by lending an open ear to the feedbacks given to the prototype and accommodating changes/requests, so as to incorporate them in the final project adds value to the final content designed. This also helps in debunking any assumptions that your team may have about certain aspects of the project.
Storyboarding is usually an iterative process, with reviews and modifications. Such changes if made in the early stages, reduces the problems like lack of clarity, grammatical and spacing errors.
Based on the storyboard, preparing a graphics development estimation chart and having them reviewed, eases the process of preparing (doodles) rough sketches for the screen for identification of graphic templates. Once the drafts are finalised and necessary changes made. Graphic templates are created which gives the assurance that a style is maintained throughout the project.
Having a first time right output approach while programming saves time and minimises issues. Once the programming is done, self review of all the functionalities, interactivities, transcript and integration is advisable before handing over to the QA team for testing.
Quality means conformity to certain standards, i.e. compliance, quality parameters as a part of the development design and programming. Quality Analysis (QA) is done to ensure that process standards are followed, and to check the efficiency of development.
Testing should be done at the unit level (page/module depending on the project) with bug density reports and other QA audits being generated at pre-set milestones. A log of all the issues should be maintained. It is important to note that while a bug-free course will help in delivering a good experience, it’s only a course that has ‘quality’ in its DNA that will deliver a ‘Great’ Custom Learning experience with high learner engagement and retention.
Step 5: Delivery
What do we do once the cooking is done?
Serve it!
Presentation is an important part of serving. In the case of Custom Learning solutions, the content can either be delivered via an LMS or sent as separate modules. Checking the course for the system specifications given by the client is necessary to ensure seamless rendering.
Close all the issues before packing off the final product. The finished course should be sent to the client for a trail run before final implementation.
In the words of W. Edwards Deming, “Quality is everyone’s responsibility.” This couldn’t be more true.
It is the responsibility of each and every member of the project team to ensure that standards and benchmarks are met along each step. Only this will complete the recipe for Great Quality Custom Learning Solutions.
Bon appétit, dear friends. Can you think of any other ingredients for delivering high-quality learning projects? Do leave your comments below.