The new version of Captivate, Version 9, has a lot of new features and enhancements over Version 8. Apart from introducing ‘Captivate Draft‘, which helps you to quickly create wireframe storyboards on iPads and review them with your SMEs, this version also has an all new Asset Library that gives access to 25000+ images, SVG support, Knowledge Check question templates, In Product LMS preview, Responsive Motion effects, iOS device capture, and so on.
We tried it out and there is certainly a lot more in the new version to improve both the development and user experiences. Let’s start with some enhancements.
Breakpoints and Scrolling Height:
Captivate 9 has five breakpoints (that’s two more than Captivate 8), allowing you to target a wider range of devices for better responsiveness. With Captivate 8, you could design for desktops/laptops, tablets in portrait mode, and phones in portrait mode, within fixed slide heights.
Captivate 9, having five breakpoints, allows you to design for both landscape and portrait modes for tablets and phones. It also allows you to define different slide heights for each breakpoint, thereby making the content more responsive.
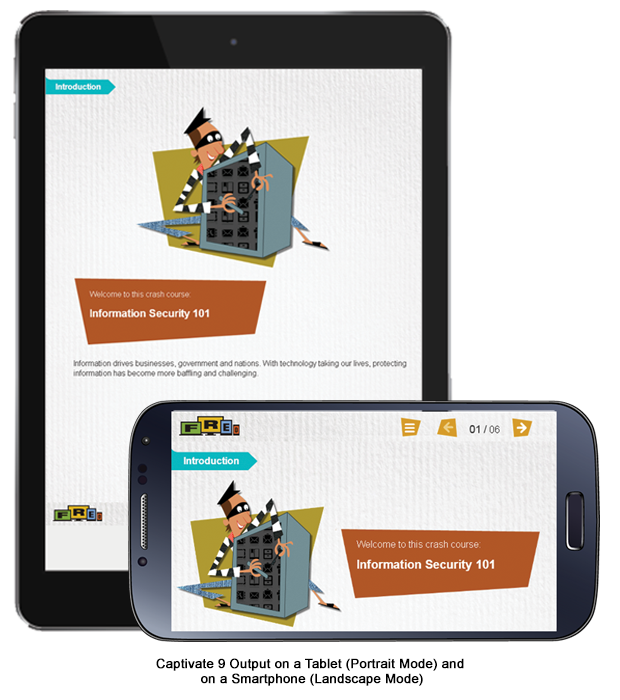
As in the earlier version, the layout for viewports that fall between breakpoints still cannot be controlled. So the best approach is to try to target the breakpoints that cover the majority of your learner base. For viewports that do not match your five breakpoints, the device will pick the closest layout and display (i.e. the one for the preceding size). So for example, if you have breakpoints for 1024px and 890px, and view the content on a device whose width lies between 891px and 1023px, the layout for 1024px will be shown. Content will still render and interactivities will still work, as long as the technical specifications are met; however, there you may see some minor misalignments in the content.
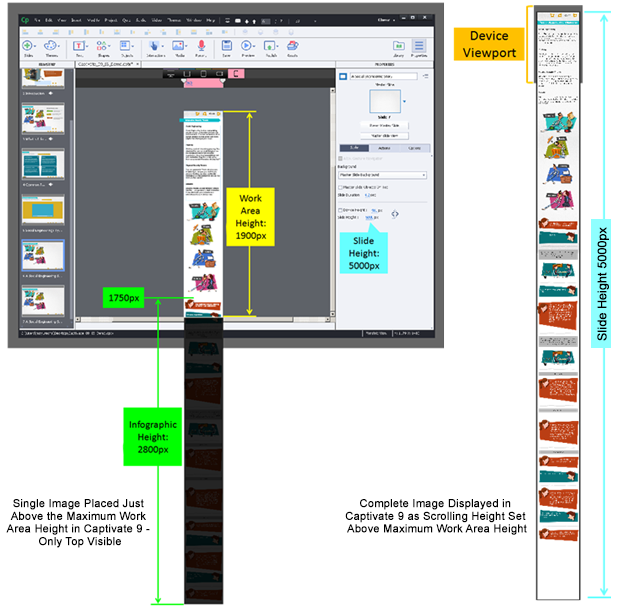
While Captivate 9 does allow you to set different slide heights for each breakpoint, there is a limitation to this height – which is 5000px. This means that you cannot have a completely (i.e. limitless) scroll-based course which many of us would typically prefer if going in for a mobile-first approach.
Another constraint to a scroll-based approach is that the Captivate 9 work area has a maximum height of 1900px – meaning you cannot easily control or edit content in place below 1900px. So for example if you have a screen with some text, graphics, and an infographic of 2800px length, you could place the infographic (as a group of elements or as an image) in the work area such that its top is just visible (e.g. at 1750px), set the slide height to say 5000px, and the entire infographic will display perfectly fine in the output on the device. But you will not be able to easily “get at” the entire infographic in the work area to edit or adjust it (unless you do some unwieldy manoeuvering).
Buttons States:
In Captivate 9, you can now add states for default and custom buttons (including custom buttons in a custom UI). So you can add common button states like rollout (only for Desktop), selected, and visited. However, note that as in the earlier version, rollover and rollout interactions essentially do not work on tablets and phones as rollover or hover is not a supported human-device interaction for touch devices.
You now also have the possibility to include custom buttons in the Quiz; so you can add extra buttons of different shapes in the quiz template.
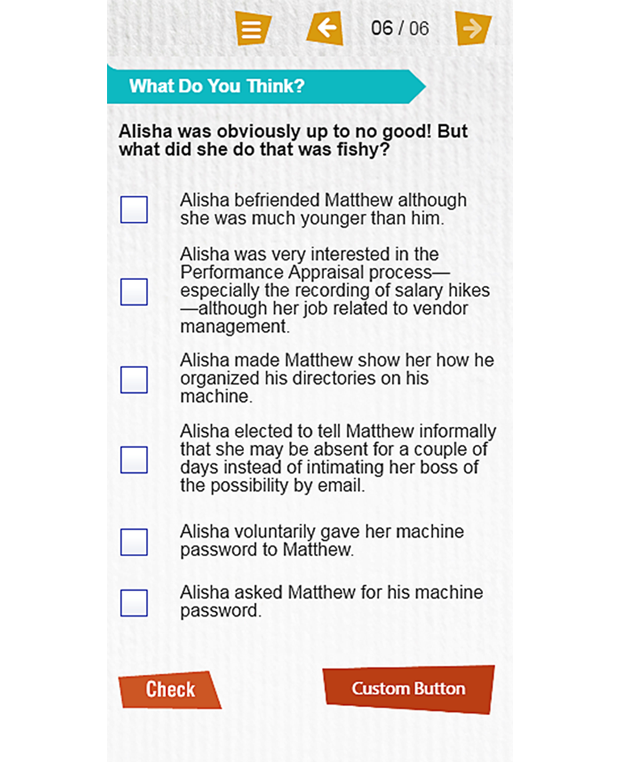 Irregularly Shaped Button on Quiz Page in Captivate 9
However, as in Captivate 8, you still cannot add custom buttons to the Play bar in Version 9.
Fonts and Text Formatting:
When it comes to fonts and text formatting, you will still need to go with system default fonts, as Captivate 9 (just like Captivate 8) does not support text embedding.
If you do need to use a custom font, one workaround could be to add the custom font file in the published version and manually make some changes to the code. In such cases, be sure to select a custom font that supports the type of formatting you have used in the project.
The good news is that the text indentation issue (in Captivate 8) seems to have been fixed.
Changing Content for Different Breakpoints:
You must show all content for all breakpoints in the “Desktop” view (i.e. the first view for the largest breakpoint); you cannot add content for a later view (i.e. a smaller breakpoint) unless it is present in the first view.
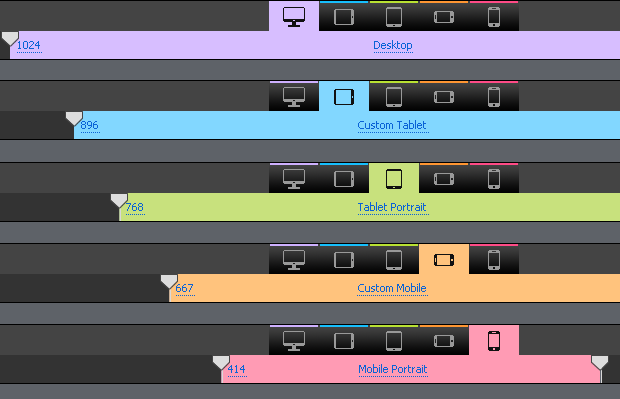 Breakpoint Views in Captivate 9
For example, if a laptop is the primary device, followed by a landscape tablet, a portrait tablet, a landscape phone, and a portrait phone, all content to be displayed on all these devices must be shown in the laptop view. For the remaining devices, content can be dropped but cannot be added or modified.
Nor is it possible to modify the treatment for different views. So a text and graphic presentation on a laptop cannot change to an interactive display on a phone.
Audio and Video Formats:
There is no change with regards to audio and video formats in Captivate 9. If there are multiple videos on the same screen, only the first video (as per the sequence on the timeline) will play on mobile devices (tablets and phones). Other videos will not load.
A possible workaround for this would be to place videos on separate successive screens. In case you are using the default player, the player “next” button will navigate from screen to screen.
In case you have customized the player, you could choose to treat the three video screens as one page with internal navigation between them, and with the player “next” button programmed to go from the first video screen to the page immediately after the last video screen.
Loading Time:
With responsive/HTML5 output, Captivate 9, like Captivate 8, loads one page at a time as the user navigates through them. There is no pre-caching. For screens that have a lot of images and graphics especially, it is important to try to use as much optimization as possible to improve their loading time.
Other Changes:
Some of the other changes we found in Captivate 9 are:
- Inbuilt interactive templates are now responsive to breakpoints. (As opposed to Captivate 8, where they used to scale for devices smaller than desktops and laptops.) One issue we faced though – not necessarily related to responsiveness – was that audio played on click of any of the interactive elements in these templates continued to play even after we moved to the next page.
- Lines have been added as available objects under Shapes for responsive projects.
- Firefox now supports shapes used as buttons.
- Objects aligned vertically or horizontally will retain their alignment on different devices.
- Animation effects on entrance/display can now be added to objects.
- Users can be prevented from using landscape orientation on their mobile phones. This can be done by selecting “Disallow phone landscape orientation” in the Publish options.
Captivate Draft:
Now coming to the new features, what we liked the most was the new app – Captivate Draft. This is available only for the iPad so far, for iOS 8.1 and above. This is more like a basic canvas that can help you create simple visual storyboards.
 Thumbnails Showing Course Branching in Captivate Draft
With one click you can send the storyboard for review to other stake holders and receive feedback. Reviewers can comment on the project using their web browser.
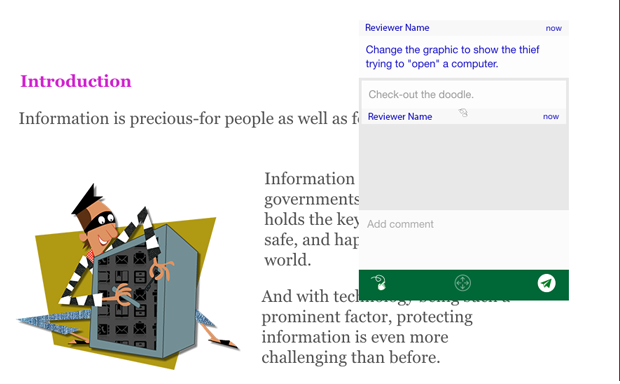 Reviewer Comment and Author Response in Captivate Draft
Draft can also come in very handy if you are working with an SME and creating content at the client site. Once all the design elements are finalized, you can upload the project to the cloud, and bring it into Captivate 9 for fine-tuning. And yes, this works for your responsive output too.
Some limitations we came across were:
- It is tedious to use the keyboard directly on the iPad. An iPad compatible keyboard would help get the job done faster.
- Any images to be added must be available in the iPad gallery.
- If the course has audio, it would be difficult for the stakeholder to review the narration without a transcript.
- The stakeholder must have either an Adobe ID or a Google+ account to be able to review the project.
SVG Support:
Another useful feature we found is Scalable Vector Graphics (SVG) support. This feature is extremely useful for responsive projects where scaling is needed. Also SVG files are comparatively less heavy than other formats like pngs.
Round Tripping with PowerPoint:
With this feature, if you import a Microsoft PowerPoint file (PPTX) into Captivate 9 as a linked object, you can edit the PPTX file directly and then simply update the link in the Captivate source to sync the content.
This can come in handy if you’re working on an HTML conversion project where there is a base PPT ready which was used in Captivate 5, 6, or 7 projects.
As with earlier versions, you do also still have the option to embed the PPTX file into the Captivate source – in which case you can open and edit the embedded file from within Captivate. (It still opens in PowerPoint.) Any changes made are immediately reflected and saved only within the PPTX file version embedded in the Captivate source file.
Note: The PowerPoint import option is disabled in the responsive project mode.
Based on our initial observations as outlined above, Captivate 9 has certainly brought in new features and also overcome some of the limitations that existed in Version 8. The more we work with the tool, I am sure we will discover more.
Meanwhile, do let us know your experience too while working with this latest version.


